
Table of Contents
Multi‑Row Panography is a way of seeing that asks you to move through a place rather than simply point at it. It’s a method and a mindset: you stitch together not just left to right but up and down, layering rows of frames until a single image contains the vertical sweep of a façade, the layered sky, and the human scale of a street. In this post I’ll walk through why multi‑row panoramas deepen the sense of place, how to plan and shoot them in urban and landscape settings, and the practical steps I use to turn dozens of exposures into a single, immersive image. The focus keyword for this post is Multi‑Row Panography.
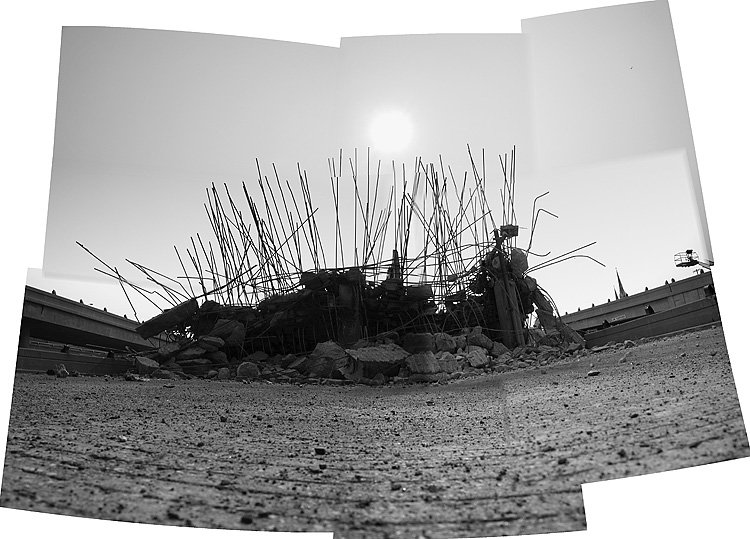
credit: jasonjpogodzinski
Why Multi‑Row Panography Changes Perception
Multi‑row panoramas — also called a matrix or grid — expand the field of view and the narrative of a scene. Where a single‑row pano flattens a horizon into a single line, a multi‑row grid captures vertical relationships: the base of a building, the rhythm of windows, the sky’s texture, and the street life between them. This layered approach creates depth through composition and scale, letting viewers travel through the frame as if walking a street or climbing a façade.
Photographically, Multi‑Row Panography also increases resolution and tonal range. Stitching multiple rows yields gigapixel‑like detail when done carefully, and the extra frames give you more data for exposure blending and noise control. Creatively, it invites a slower practice: you walk, you observe, you return to a viewpoint and shoot again, letting the city or landscape reveal itself in increments. The matrix/grid method turns time and movement into image data, so the final panorama carries the accumulated gestures of the photographer as much as the architecture or horizon it records.
Planning a Multi‑Row Shoot
Choose the Right Location
Look for subjects with vertical interest: tall buildings, cliffs, layered horizons, or streets with strong foreground elements. Urban architecture rewards multi‑row panography because façades, cornices, and sky all demand vertical space. For landscapes, think of canyons, mountain faces, or coastal cliffs where the vertical scale tells part of the story.
Scout and Frame
Walk the block. Find a vantage point that lets you capture the subject without too much foreground obstruction. Note the light direction and how it will change across the time you expect to shoot. Decide whether you want a portrait orientation grid (taller than wide) or a landscape grid (wider than tall). Sketch a simple grid in your head: how many columns and rows will you need to cover the subject with 30–50% overlap?
Gear Essentials
- Tripod with a sturdy head: stability matters when you’re shooting many frames.
- Ballhead or pano head: a nodal slide or pano head helps reduce parallax for close architectural elements.
- Wide to normal focal lengths: 35–85mm equivalents are common; avoid extreme wide angles that exaggerate distortion.
- Remote release and bubble level: to minimize camera shake and keep rows aligned.
- Neutral density or graduated filters (optional): for balancing sky and foreground.
Shooting Technique: Rows, Overlap, and Exposure
Establish the Grid
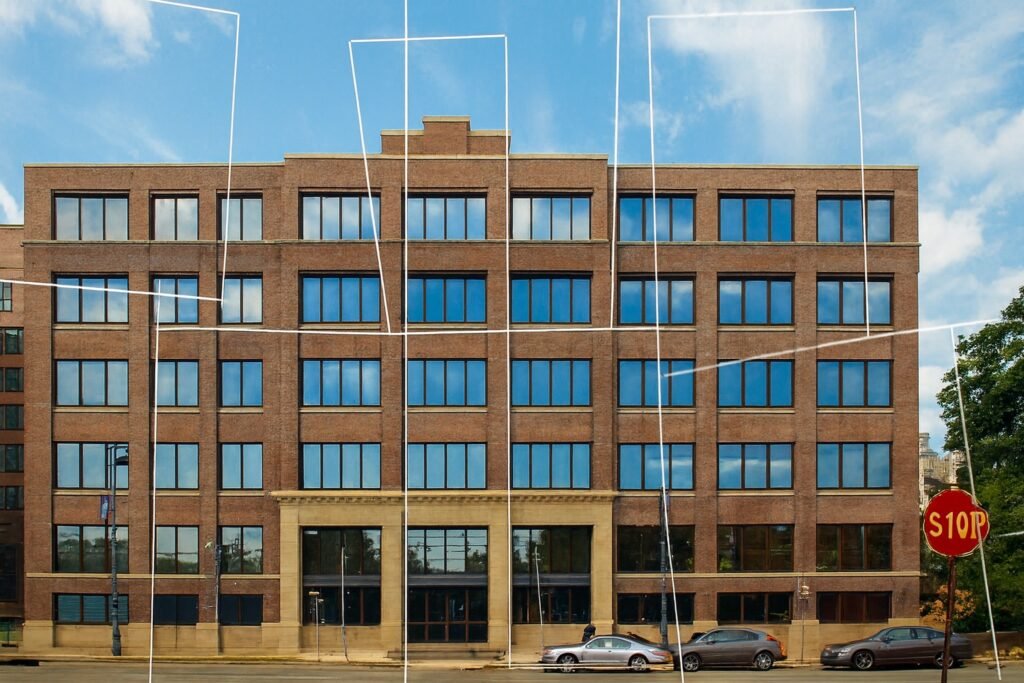
Start at one corner of your intended grid. For a typical city façade I shoot 3–5 columns and 2–4 rows depending on height. Keep 40–60% overlap horizontally and vertically to give stitching software plenty of matching detail. For my UWM Kenilworth Building multi‑row grid, I shot across the street, panning up and down, then moved several feet down the block and repeated the sequence until I had roughly 40 images that covered the entire façade and the sky above.
Maintain Consistent Exposure
Use manual exposure or aperture priority with exposure lock. Consistency across frames makes blending easier. If the scene has a bright sky and darker street, bracket exposures or use exposure blending later. Shoot RAW to preserve highlight and shadow detail.
Mind the Nodal Point
When foreground objects are close, parallax becomes a problem. If you’re photographing architectural details with nearby elements, use a nodal slide or rotate around the lens’s entrance pupil to avoid stitching errors. For distant cityscapes, parallax is less critical, but consistent rotation and level framing still matter.
Move with Purpose
Shooting a multi‑row pano is a choreography: rotate, tilt, shoot, step, repeat. Keep notes if you need to—mark the starting corner and the direction you’re moving. In busy urban settings, you may need to wait for pedestrians or cars to clear a frame, or embrace them as part of the scene’s life.
Embracing Imperfection: When the Matrix Lets You Wander
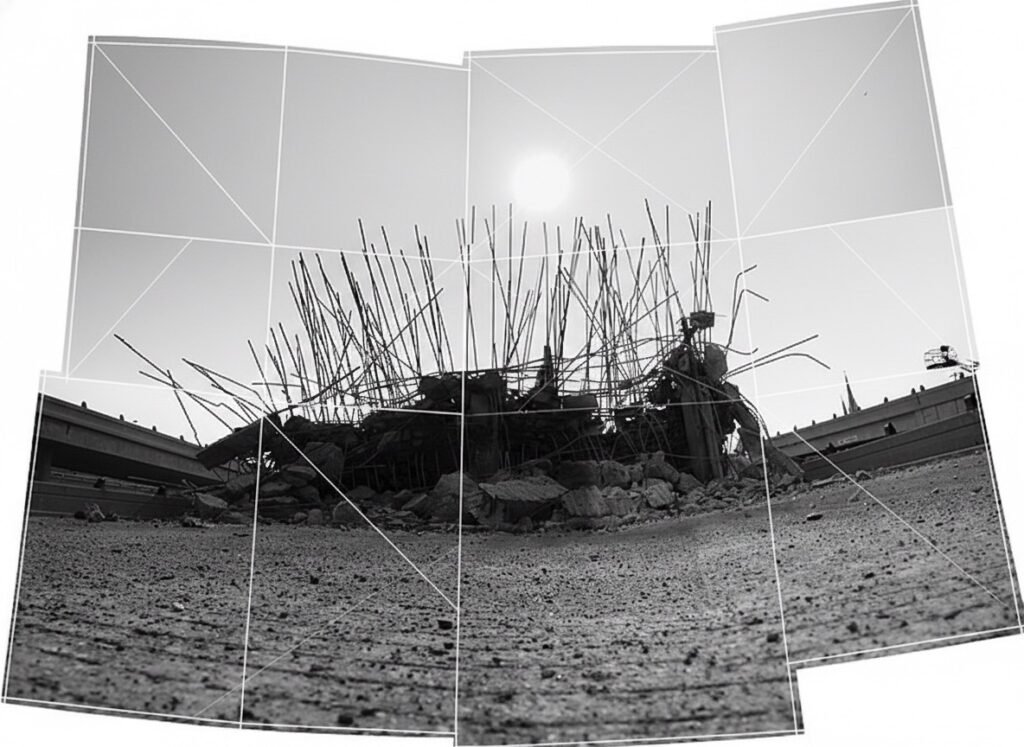
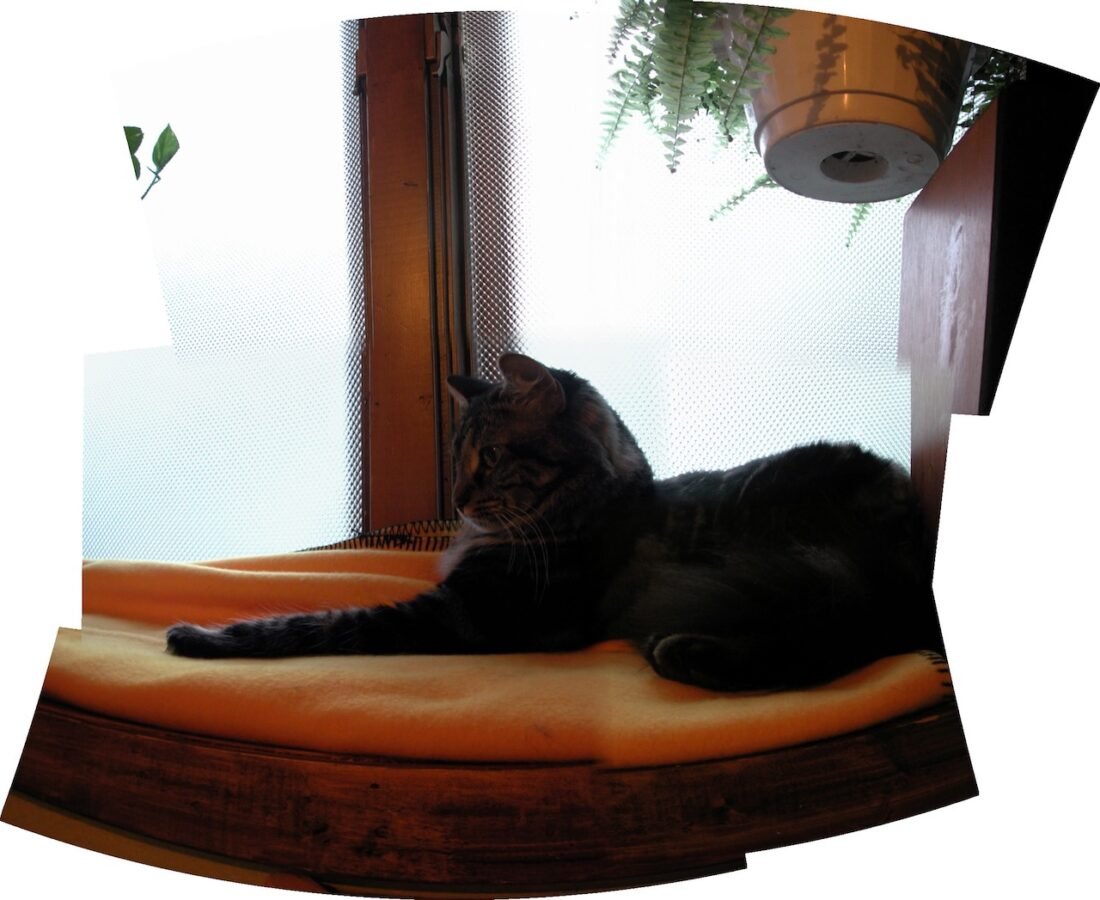
Not every multi‑row panorama needs to be a technical exercise in perfect tilt and nodal precision. In fact, some of the most compelling images arrive when you loosen the rules and let the matrix — the grid of frames that becomes your final panorama — accumulate small mismatches, shifts, and overlaps. Call it a happy accident, a deliberate looseness, or simply the creative freedom of stitching odds and ends together: the result can be a panorama that feels lived in, layered with time and movement rather than engineered into a single, clinical view.
When you stop obsessing over the nodal point and exact tilt, you open space for serendipity. Parallax that would normally be a problem becomes a textural cue; slightly different perspectives of the same window or cornice can read as rhythm rather than error. Programmatic stitching tools and manual compositing both offer wiggle room: automated algorithms will often reconcile mismatched frames in surprising ways, while hand‑placed control points let you decide which overlaps to honor and which to smooth. Either approach can produce a panorama that reads like a memory — stitched from moments rather than a single decisive instant.
This looseness is especially useful in urban panography. Streets change while you shoot: a delivery truck moves, a shadow slides across a façade, a pedestrian pauses and then is gone. Rather than fight those shifts, embrace them. Let exposure blending and selective masking keep the best parts of each frame; let the grid show its seams in subtle tracing lines or gentle misalignments that remind the viewer this is an assembled view. The multi‑row grid or matrix becomes not just a technical scaffold but a narrative device, recording the photographer’s movement and the city’s small, transient events.
That said, there’s a balance to strike. Too much randomness can fragment scale and confuse perspective; too much correction can sterilize the image. The trick is to choose which imperfections enhance the story and which to correct. When you do, Multi‑Row Panography rewards you with images that are rich in detail, generous in scale, and honest about the process that made them — a stitched map of place, time, and the photographer’s wandering eye.
Post‑Processing Workflow
Import and Cull
Bring all RAW files into your catalog. Cull duplicates and obvious misfires. Keep the sequence intact so you can visualize the grid.
Lens Corrections and Color
Apply lens profile corrections and a consistent white balance. Make global adjustments for exposure and contrast before stitching; this reduces the work later.
Stitching
Use panorama software that handles multi‑row grids well. Load images in sequence and let the software detect control points. Expect to do some manual alignment for complex architectural lines. After stitching, crop to remove irregular edges and correct perspective if needed.
Exposure Blending and Sharpening
If you bracketed, blend exposures before or after stitching depending on your software. Apply local adjustments to restore shadow detail and bring out textures. For architectural panography, selective sharpening on edges and textures helps convey materiality without creating halos.
Final Output
Export at a resolution that suits your use: web, print, or gallery display. Multi‑row panography often benefits from large prints where the viewer can step closer and discover details.
Case Study: UWM Kenilworth Building Multi‑Row Grid
![]() GOOGLE MAPS
GOOGLE MAPS
1915 E Kenilworth Pl, Milwaukee, WI 53202
Maps are essential for visualizing location-based information. Explore the area related to "1915 E Kenilworth Pl, Milwaukee, WI 53202" and find points of interest nearby.
I shot the UWM Kenilworth Building on a late afternoon when the city’s light softened the concrete and glass. From across the street I made a vertical sweep—a few rows high—then moved several feet down the block and repeated the sweep, keeping the camera height and tilt consistent. The final set was about 42 images.
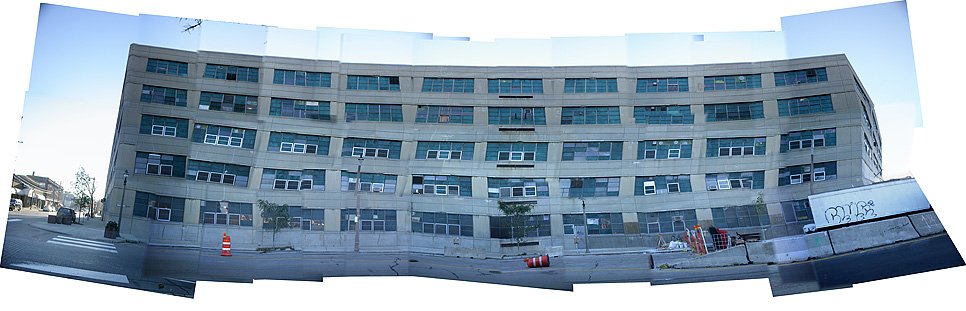
Challenges included passing cars and keeping going. It seemed like it was always just one more row. I used 50% overlap, manual exposure, and a hand held camera. The result was a single, long panorama that preserved the building’s scale and the layers, inviting viewers to travel from side to side in one continuous frame.
Creative Uses and Presentation
- Gallery prints: tall, narrow prints emphasize verticality and invite viewers to move their eyes up and down.
- Interactive web viewers: allow zooming into the gigapixel detail for exploration.
- Architectural documentation: multi‑row panography records façades with high fidelity for conservation or study.
- Environmental storytelling: combine cityscapes with foreground human activity to show how people inhabit a place.
Common Pitfalls and How to Avoid Them
- Insufficient overlap: leads to stitching gaps; aim for 40–60% overlap.
- Changing exposure: use manual settings or consistent metering to avoid visible seams.
- Parallax with close objects: use a nodal slide or increase distance to the subject.
- Unleveled rows: use a bubble level and check the horizon between rows.
Frequently Asked Questions
What is the difference between single‑row and multi‑row panoramas?
Single‑row panoramas stitch images horizontally; multi‑row panoramas add vertical rows to capture height and layered detail, increasing resolution and depth.
How many images do I need for a multi‑row panorama?
There’s no fixed number; typical grids range from a dozen to several dozen images depending on coverage and overlap, like the 40‑image grid I used for the UWM Kenilworth Building.
Do I need special software to stitch multi‑row panoramas?
Yes, use panorama software that supports multi‑row stitching and manual control points to handle complex alignments and perspective correction.
How do I avoid parallax when shooting close architectural details?
Rotate the camera around the lens’s nodal point using a pano head or nodal slide to minimize parallax between foreground and background elements.
Can I shoot multi‑row panoramas handheld?
Handheld is possible for distant scenes with minimal parallax, but a tripod yields more consistent alignment and cleaner stitching for architectural work.
 Panography.org | PANORAMA STYLES & APPROACHES
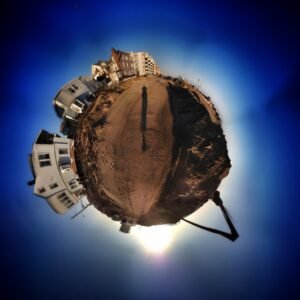
360° Panography | Little Worlds Panorama
Step inside a spherical reality where the horizon bends into a miniature planet, offering a playful and immersive take on the traditional landscape.
Final Thoughts
Multi‑Row Panography is a practice of patience and attention: it asks you to move through a place, to map its vertical and horizontal rhythms, and to assemble those moments into a single, layered image. Whether you’re documenting a city façade or a canyon wall, the technique rewards careful planning, steady technique, and a willingness to let the scene reveal itself across many frames. The UWM Kenilworth Building grid taught me that the city yields its secrets when you take the time to stitch them together—one row, one column, one careful exposure at a time.
credit: jasonjpogodzinski